HOW TO USE YOUR DOWNLOADABLE HYMNAL
Download and import your Hymnal .zip file (HFWR.zip or HFWS.zip for instance) into R.J. Stevens Music Presentation Creator (see below) to begin using your Electronic Edition hymnal to build song worship presentations.
If you already have Presentation 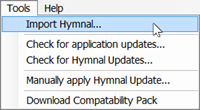 Creator (version 2 is required), all you need to do is:
- Download your Electronic Edition hymnal using the link included in your online order
- Take note of the directory/folder where you save your hymnal .zip file(s)
- Import the hymnal by clicking Import Hymnal from the Tools menu*
Note: the hymnals are large and may take several minutes to import.
Additional information is provided below for downloading, installing and using R.J. Stevens Music Presentation Creator.
DOWNLOADING AND INSTALLING PRESENTATION CREATOR
DOWNLOADING PRESENTATION CREATOR
Click here to download the R.J. Stevens Music Presentation Creator Version 2 software:
R.J. Stevens Music Presentation Creator
R.J. Stevens Music Presentation Creator is a Microsoft Windows (Vista through Windows 10) application. Depending on the version of Windows you are running, the Presentation Creator installer may also install .NET Framework V4.5. If you are asked to install .NET Framework V4.5, respond to the prompts and complete the install. The installation instructions and screenshots provided below are from an installation of Presentation Creator V1.5 on Windows 10.
If you have issues installing Presentation Creator, please email our support team: [email protected]
INSTALLING PRESENTATION CREATOR
1. After you download presentationcreator.zip file to your Windows PC, you will need to extract the file and run the setup program. Click here if you are unfamiliar with extracting compressed .zip files: extracting .zip files
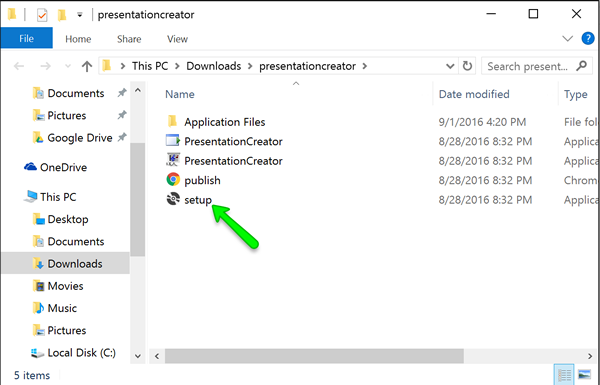
2. After you extract the presentationcreator.zip file, locate and double-click the setup file to start the installation process:
NOTE: A message about installing the .NET Framework may be displayed if .NET Framework V4.5 is not already installed. Proceed with the install of .NET Framework V4.5 if prompted. Ensure you are connected to the internet and click Accept and follow the prompts. This will automatically download the required software for your computer from the Microsoft website.
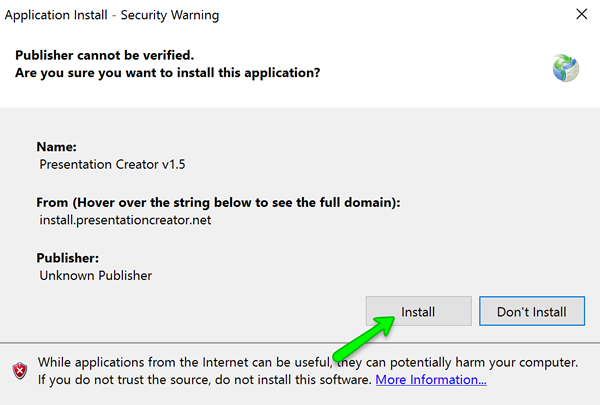
3. After clicking on setup, the installation process should begin and you will be presented with an Application Install security warning dialog box. Click Install to proceed with the installation of Presentation Creator:
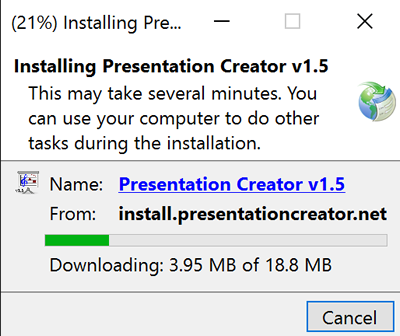
NOTE: The installation process may download additional files for Presentation Creator and you may see the following progress dialog box:
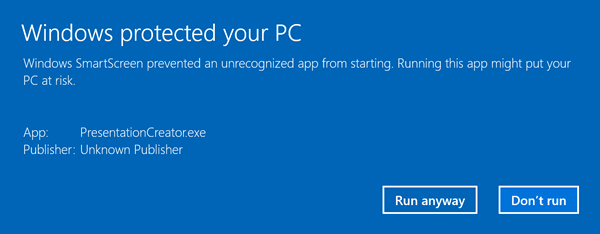
4. After the installation process completes, Presentation Creator should open. However, when installing on Windows 10, the following message may appear. Click “Run anyway” to start Presentation Creator:
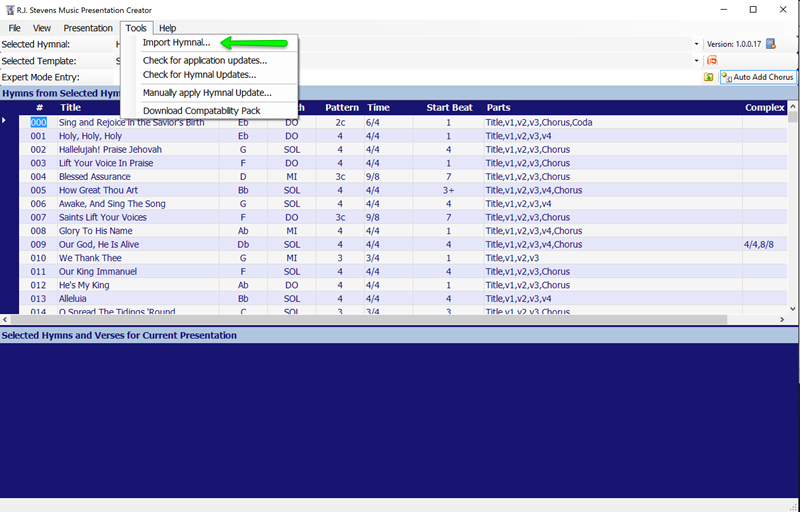
5. You can now proceed with importing your eChoice hymn(s). Click Tools and Import Hymnal from the menu bar:
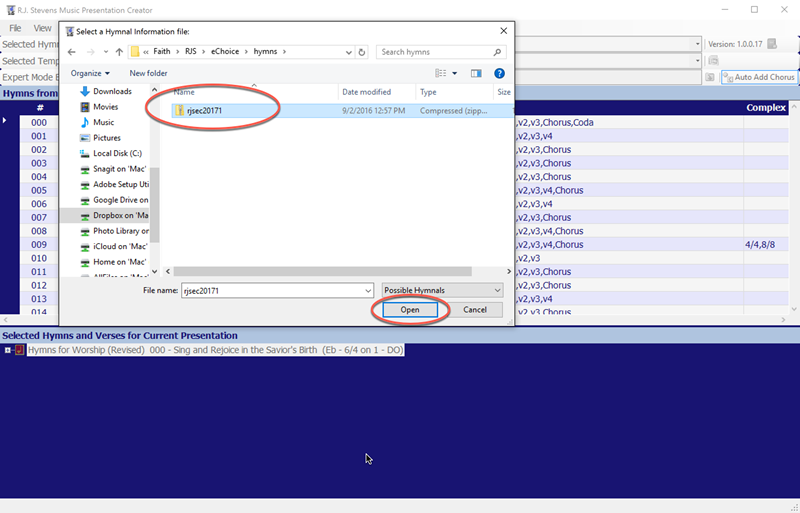
6. Browse to the location/folder where you previously saved your eChoice hymn .zip file(s), select your hymn .zip file and click Open:
NOTE: If you have purchased and downloaded more than one eChoice hymn, you may select multiple hymn .zip files and import them at the same time.
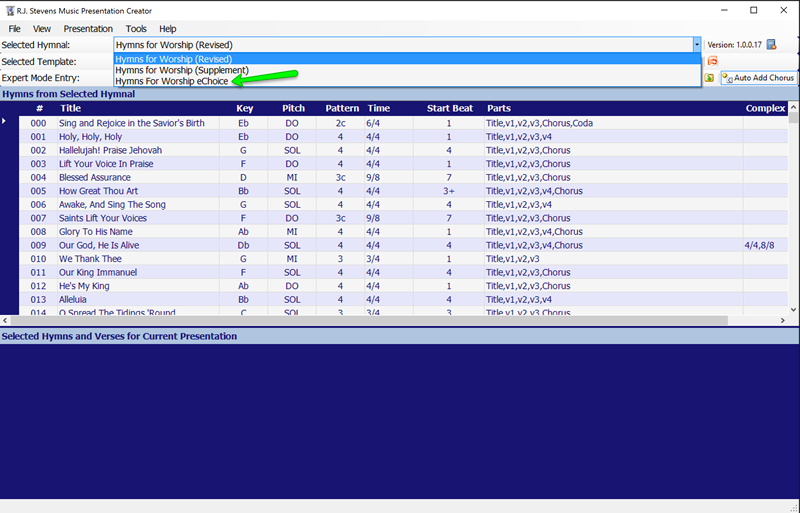
7. Presentation Creator will then import the eChoice hymn file(s) and a new Hymns for Worship eChoice hymnal should now be available in your Selected Hymnal drop-down menu. Select the Hymns for Worship eChoicehymnal from the drop-down list:
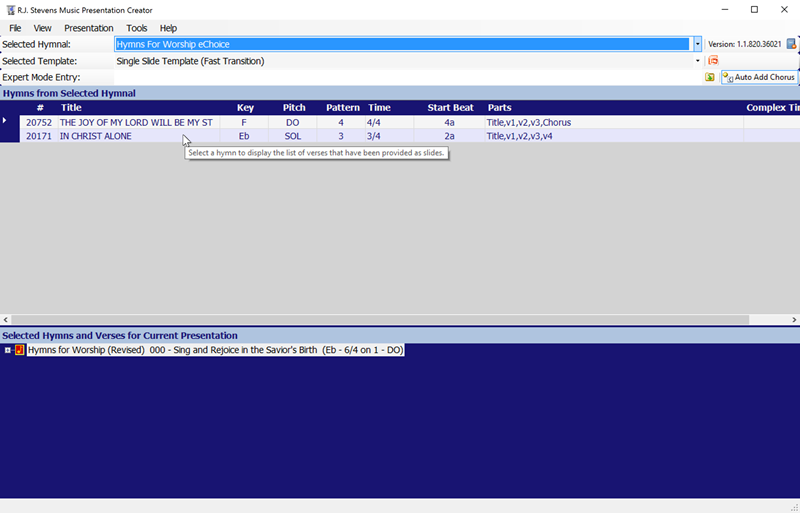
8. After selecting the Hymns for Worship eChoice hymnal from the Selected Hymnal drop-down list, your eChoice hymns will display in the lower window:
Congratulations! You have successfully installed the R.J. Stevens Music Presentation Creator software.NOTE: If you subsequently purchase additional eChoice hymns, you will need to also import them into Presentation Creator after you download the hymn .zip files.
Be sure to check the R.J. Stevens Music website for additional eChoice hymns. Our plan is to provide quarterly releases of new eChoice hymns.
We hope you and your congregation benefit from this innovative way of obtaining new songs, hymns and spiritual songs (Colossians 3:16)!
If you have any questions or need assistance with eChoice hymns or the R.J. Stevens Music Presentation Creator software, please email our support team: [email protected]
USING PRESENTATION CREATOR
SELECTING HYMNS
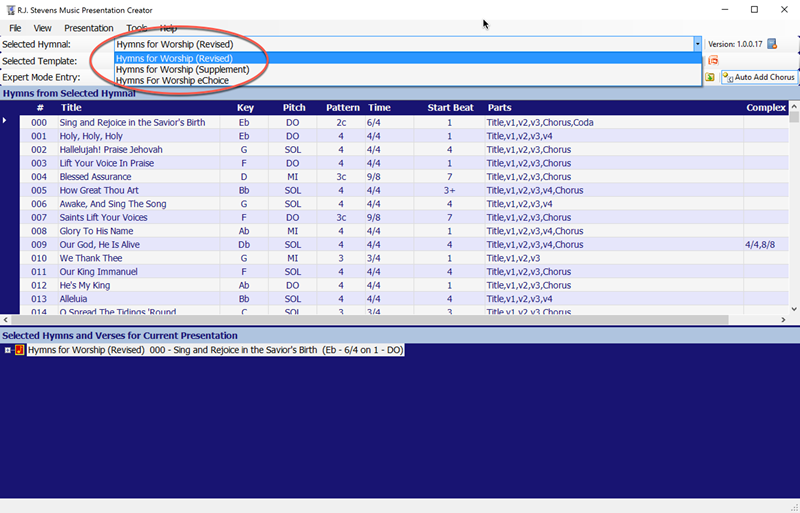
1. In the Selected Hymnal dropdown list, select the hymnal where your hymn is located: Hymns for Worship (Revised), Hymns for Worship (Supplement), Hymns for Worship eChoice:
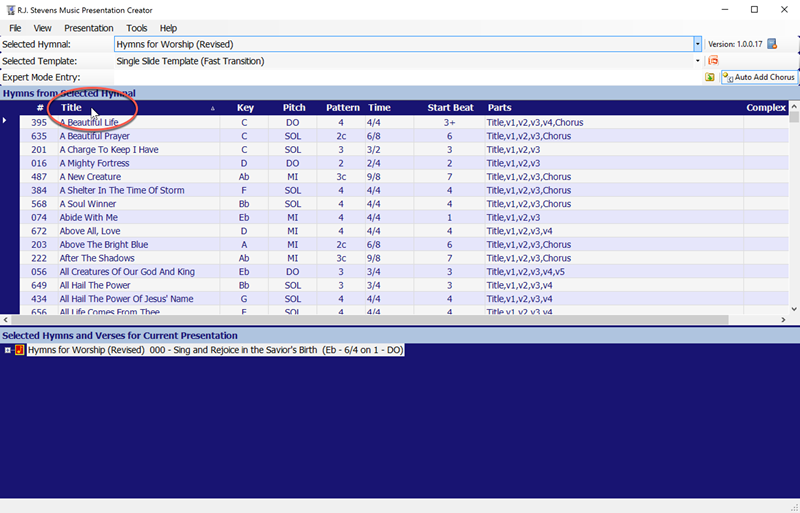
2. It is possible to sort the list of hymns by clicking the column header (the dark blue row at the top of the list). For instance, if you want to sort by title, simply click the word Title over the list of hymns and it will sort the hymns in Alphabetical order (A-Z if you click once, or Z-A if you click twice):
3. To begin creating your presentation, right-click on the hymn and select one of the the following options from the context menu:
Entire Song Options
- Standard – Each verse is followed by the chorus. You may select this mode and choose which verses you would like to sing.
- Chorus Only Once (Only available when a hymn has a chorus) – Select which verses you would like to sing, and the chorus will display only once following the last verse selected.
Single Verse Options
-
Single Verse – Displays only the selected verse
-
Chorus – Displays the chorus with no verses
-
Coda – Adds only the coda
- Sanctus – Adds only the Sanctus
NOTE: You must right-click on the hymn to use the context menu. If you left-click, it will select the text and will not create the presentation correctly.

|
Hymns for Worship Revised Electronic Edition Designation for Varying Arrangements In order to “match” a newer arrangement of a hymn from Hymns for Worship Revised printed edition with the electronic edition, a designation or suffix is provided in Presentation Creator, at the end of the song number which indicates when the new arrangement was released. For example, the “15th printing” had several hymns which were enhanced with an additional verse, descant, arrangement, etc.. Those hymns are song numbers: 13.15 (Alleluia) The designation or suffix (.15), indicates that from the “15th Printing” and each subsequent printing, that particular arrangement remains unchanged. Any song used prior to the “15th Printing” is indicated without the suffix. In other words, if a congregation has an earlier printing of Hymns for Worship Revised, they should use song numbers 13, 41, 51, 92, or 701 and not 13.15, 41.15, 51.15, 92.15, or 701.15. There’s one other change that took place in the 12th Printing: 668.12 (The Greater Light). Every printing since the 12th printing has the same arrangement. If a congregation has an earlier printing of Hymns for Worship Revised, they should use song number 668 and not 668.12. |
4. After selecting the appropriate hymn and verse combination, the hymn information will appear at the bottom of the screen in the large blue area. Each hymn displays a + sign. Clicking the + sign expands the view to show the selected portions of the hymns in the order which they will be displayed. You may still edit the selections. To reorder the hymns, right-click on a hymn and select move up or move down. You can also delete the hymn using this function. Verses may also be rearranged or removed using the same process.

5. To save the presentation at any time, click the File menu at the top of the screen then click Save.
DISPLAYING A PRESENTATION
The program is designed to be able to create a slide show with or without the use of an external viewer such as Microsoft PowerPoint.
To export your presentation to Microsoft PowerPoint:
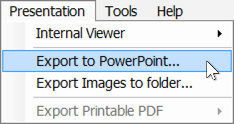
1. On the main menu bar, click Presentation and click Export to Microsoft PowerPoint…:
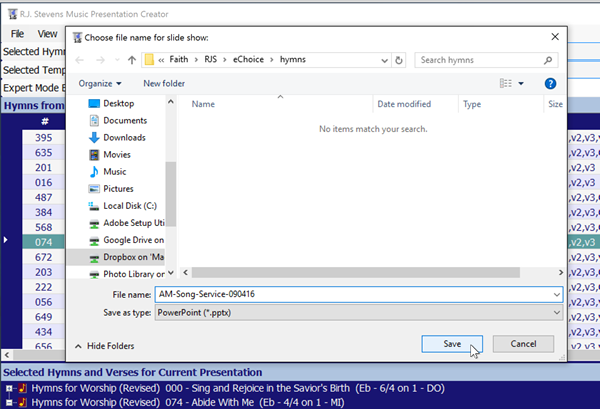
2. Name the .ppt file and click Save to save the file to a folder on your computer:
3. Open the .ppt file using Microsoft PowerPoint.
NOTE: If you are using a version of Microsoft PowerPoint prior to Office 2007, you will need the compatibility pack. Click here to download the compatibility pack:
To display using the internal viewer:
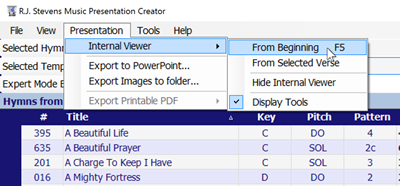
1. On the main menu bar, click Presentation and click Internal Viewer.
2. Select where you want to begin your presentation: From Beginning or From Selected Verse:
3. Use the arrow keys on your keyboard to advance through the hymn slides.
4. To stop using the Internal Viewer, on the main menu bar, click Presentation, Internal Viewer and Hide Internal Viewer.
To export the images to a folder:
1. On the main menu bar, click Presentation and click Export Images to folder…
2. Select a folder for your hymn images and click Ok.
Each image will be saved separately as a PNG file and can be opened with an image viewing program.
EXPERT MODE ENTRY
The Expert Mode Entry toolbar allows the user to enter hymns using numeric notation without manually searching through the list of hymns. For an entire hymn, type the hymn number. To specify specific portions of the hymn, enter a colon (:) then the portions of the hymn. A portion of a hymn is specified by the following notation:
|
1…9 |
Verse number |
|
C |
Chorus |
|
D |
Coda |
|
S |
Sanctus |
|
A |
Amen |
Separate hymns with a semi-colon (;). Any number of hymns can be added using expert mode:
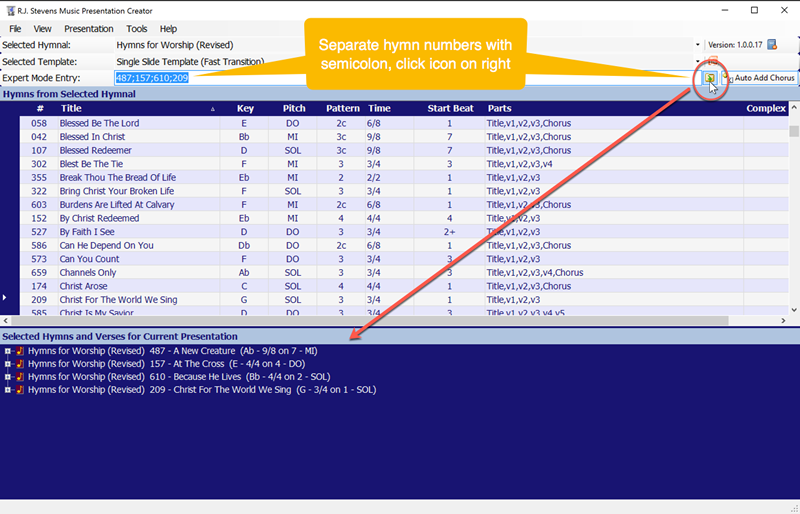
Hymns can be added using Expert mode and the Traditional mode then rearranged once the hymns are listed at the bottom of the screen.
For example 0;48:1,3,S;11:1,3,C would add hymn number 000. The Auto Add Chorus selection specifies if the chorus will follow each verse or will be added only once at the end of the hymn. Hymn 48 would then be added with only verse 1 and 3 followed by the Sanctus. Hymn 11 would then be added with verses 1 and 3 followed by the Chorus only once at the end.
Currently the expert mode entries are found in the selected hymnal only. To select hymns from multiple hymnals, enter the hymns from one hymnal, press the Add button, then select the other hymnal and repeat.
PRESENTATION CREATOR PROGRAM GUIDE
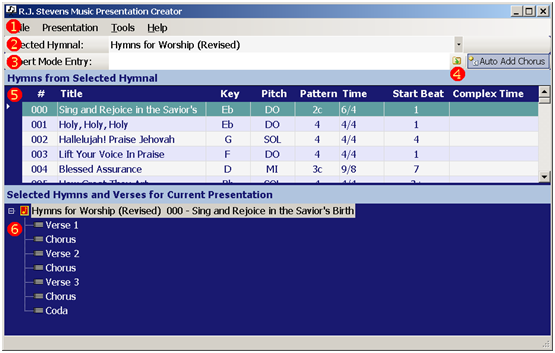
1 Menu Bar
2 Select Hymnal Toolbar
3 Expert Mode Entry Toolbar
4 Add Button (for Expert Mode Entry)
5 Hymns from Selected Hymnal Grid
6 Selected Hymns and Verses for Current Presentation Tree